With the release of Honkai Star Rail 4.1, two new regions have been added to the map of Planarcadia, namely Pearluxe Tower and Lookout Cloud Station. Both these regions have plenty of puzzles for players to find and solve, including the Shiftmation puzzles that were first introduced in version 4.0.
This article provides a guide on locating and solving all the Floating Grease Origin Retrace Shiftmation Puzzles in the Pearluxe Tower map of Planarcadia.
Honkai Star Rail 4.1 Pearluxe Tower Shiftmation Puzzles guide
There are a total of three Shiftmation puzzles that can be found in Pearluxe Tower in Honkai Star Rail 4.1. The following are their locations and steps for solving them:
Puzzle #1
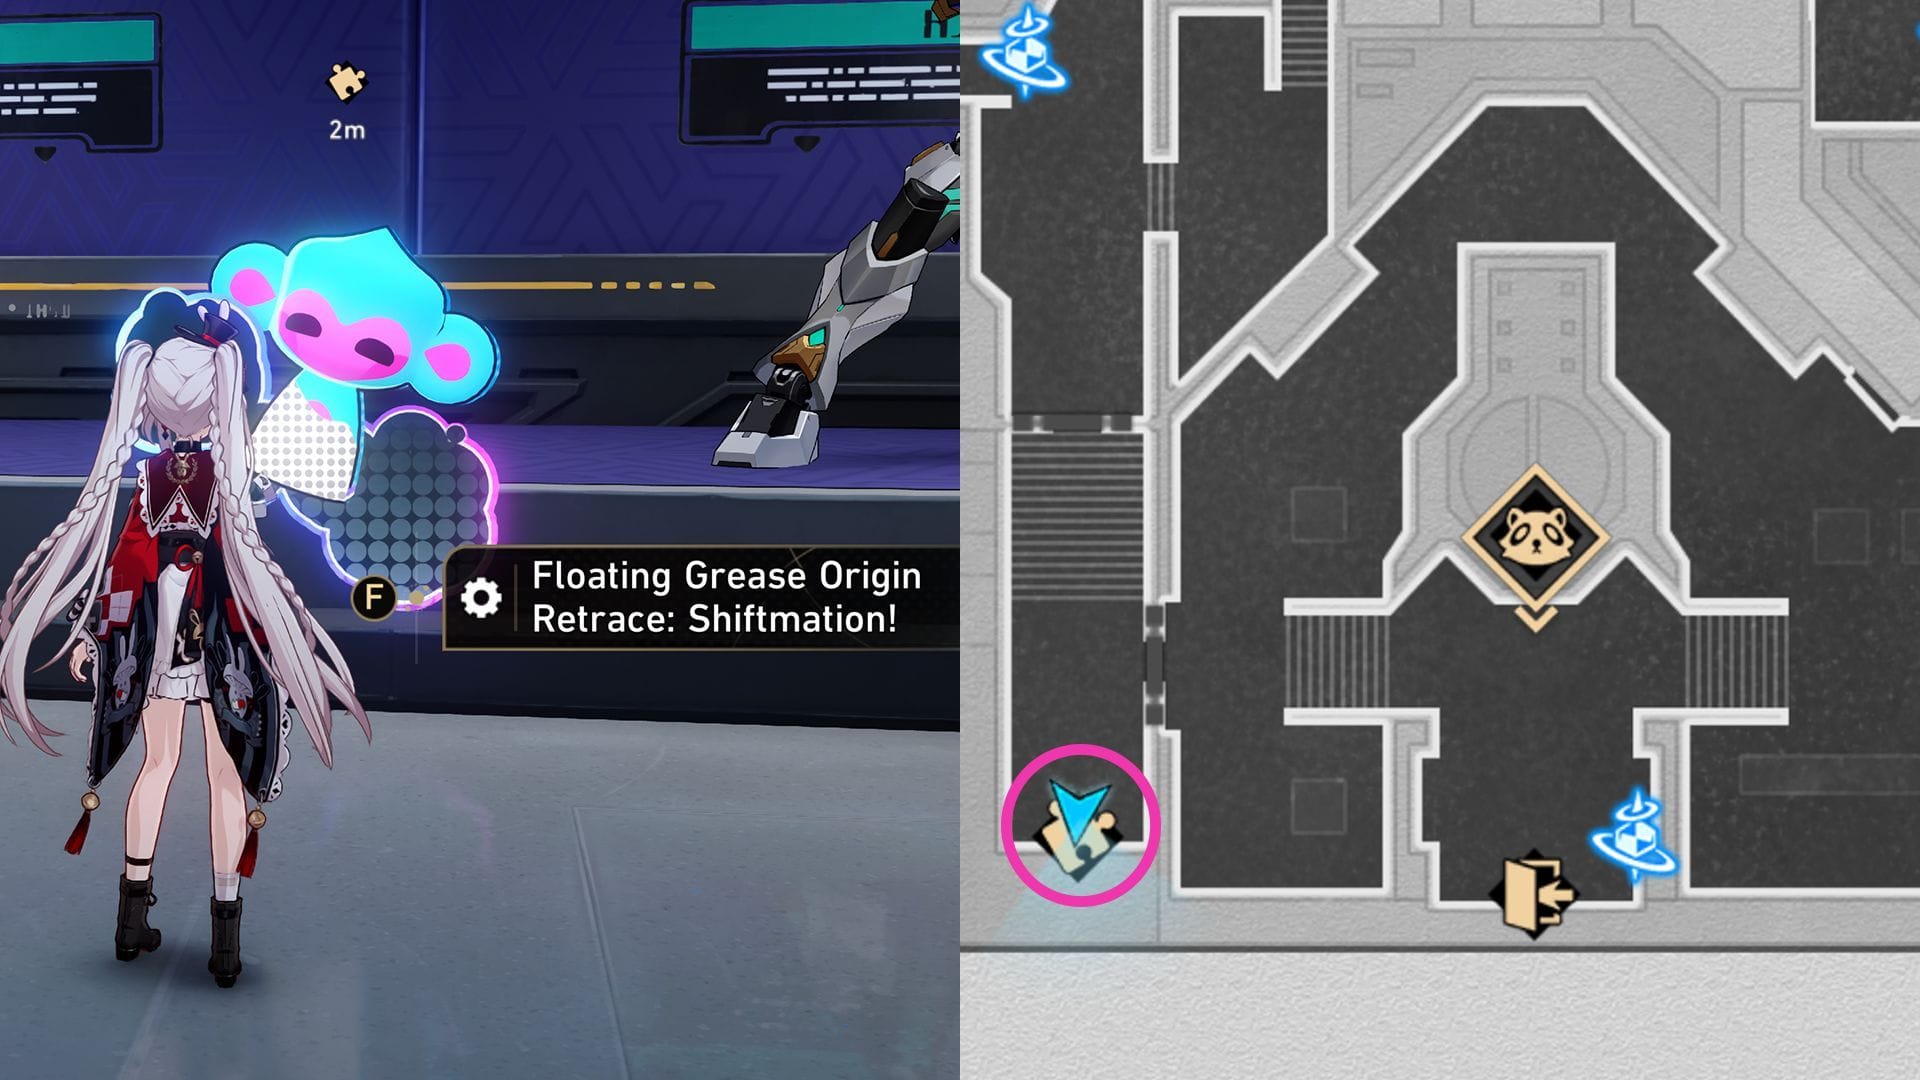
Teleport to the Model Showcase Zone Space Anchor, and head up the stairs on the left. Go through the door and turn left to find the Shiftmation puzzle.
Follow these steps to solve it:
- Stand at your initial position and press E once (rotate anti-clockwise).
- Head right and reclaim the paint.
- Press Q (rotate clockwise).
- Jump to the very top using the pillars on the left to reclaim the second paint.
- Jump down to stand on the blue platform, and press Q (rotate clockwise).
- Jump to the top, and go left to reclaim the paint.
- Finally, simply jump down to reach the monkey and finish the puzzle.
Also read: Honkai Star Rail 4.1 redeem codes
Puzzle #2
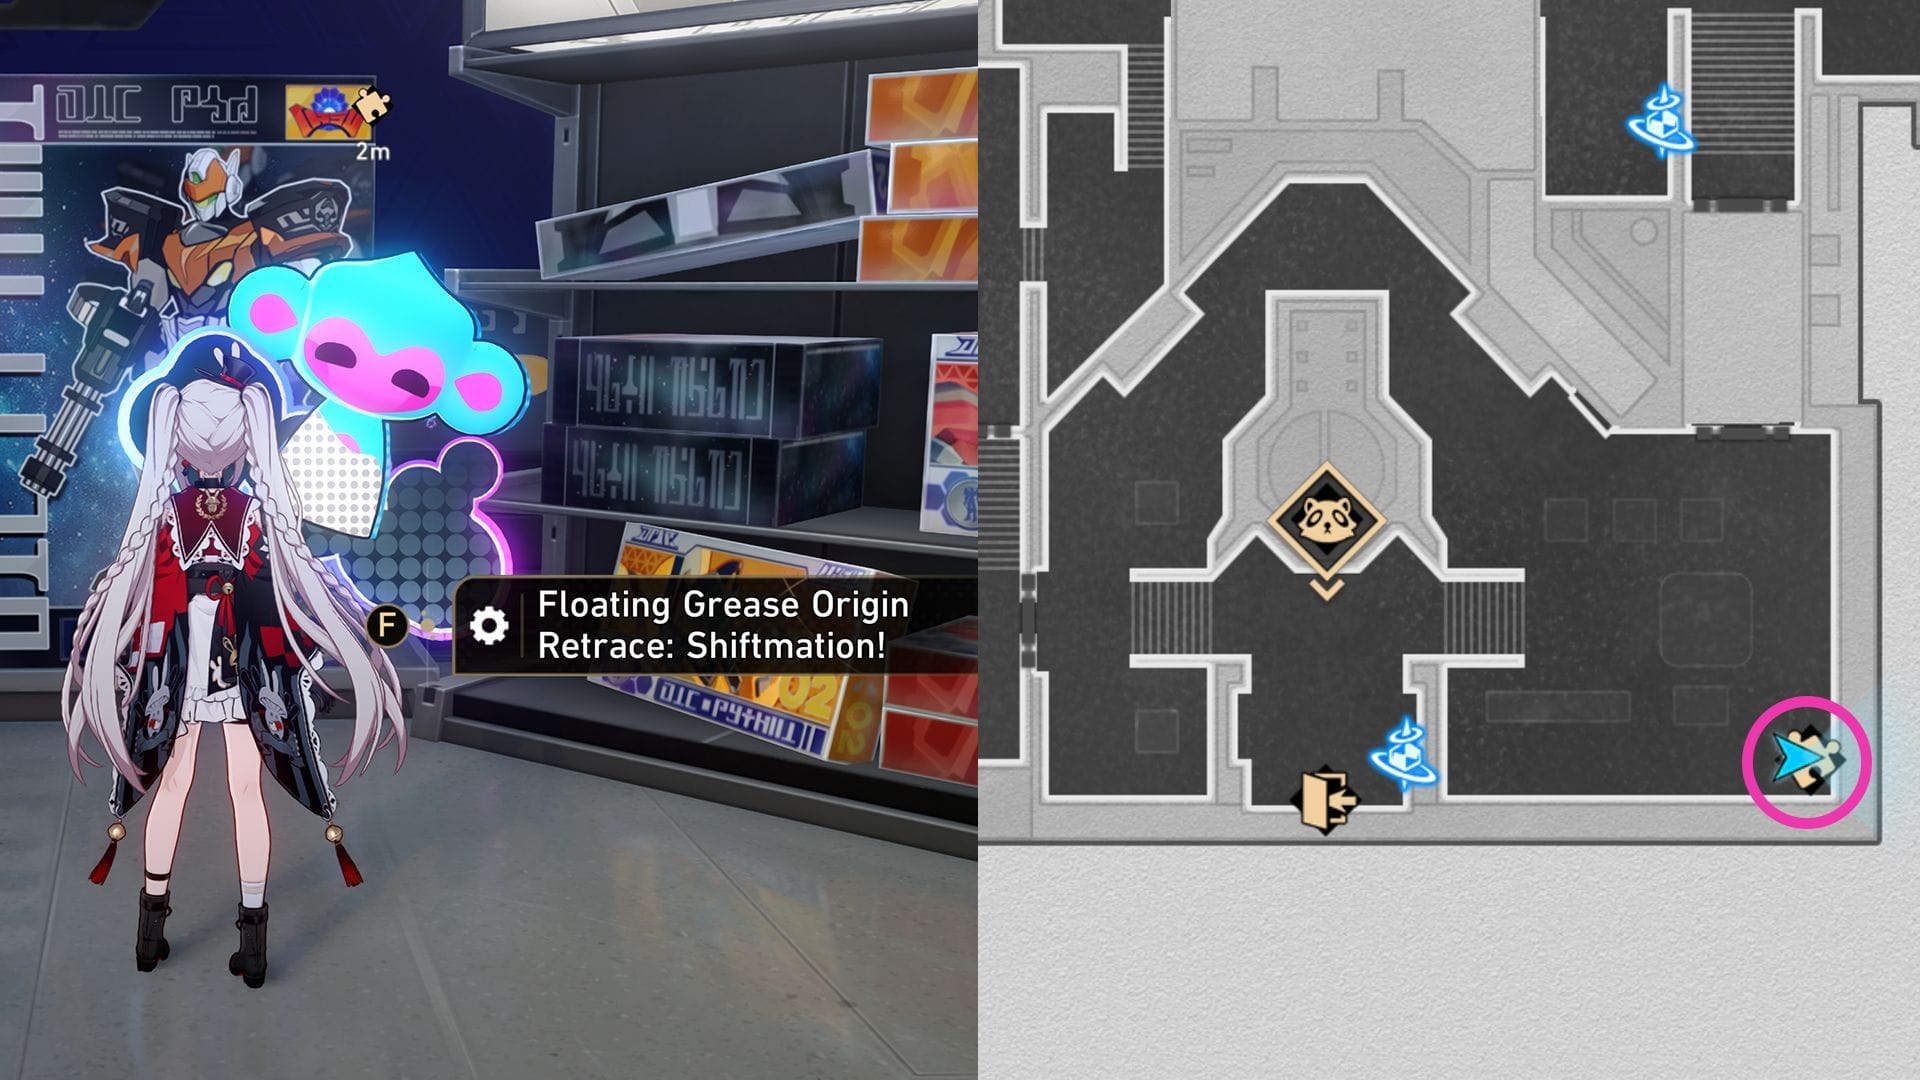
Teleport back to the Model Showcase Zone Space Anchor, and go up the stairs on the right. Head to the corner of the room to locate the Shiftmation puzzle.
Follow these steps to solve it:
- Jump to the two blue blocks on the far right, and press E once (rotate anti-clockwise).
- Jump up to the very top to reclaim the paint.
- Head to the top again to interact with the monkey and finish the puzzle.
Puzzle #3
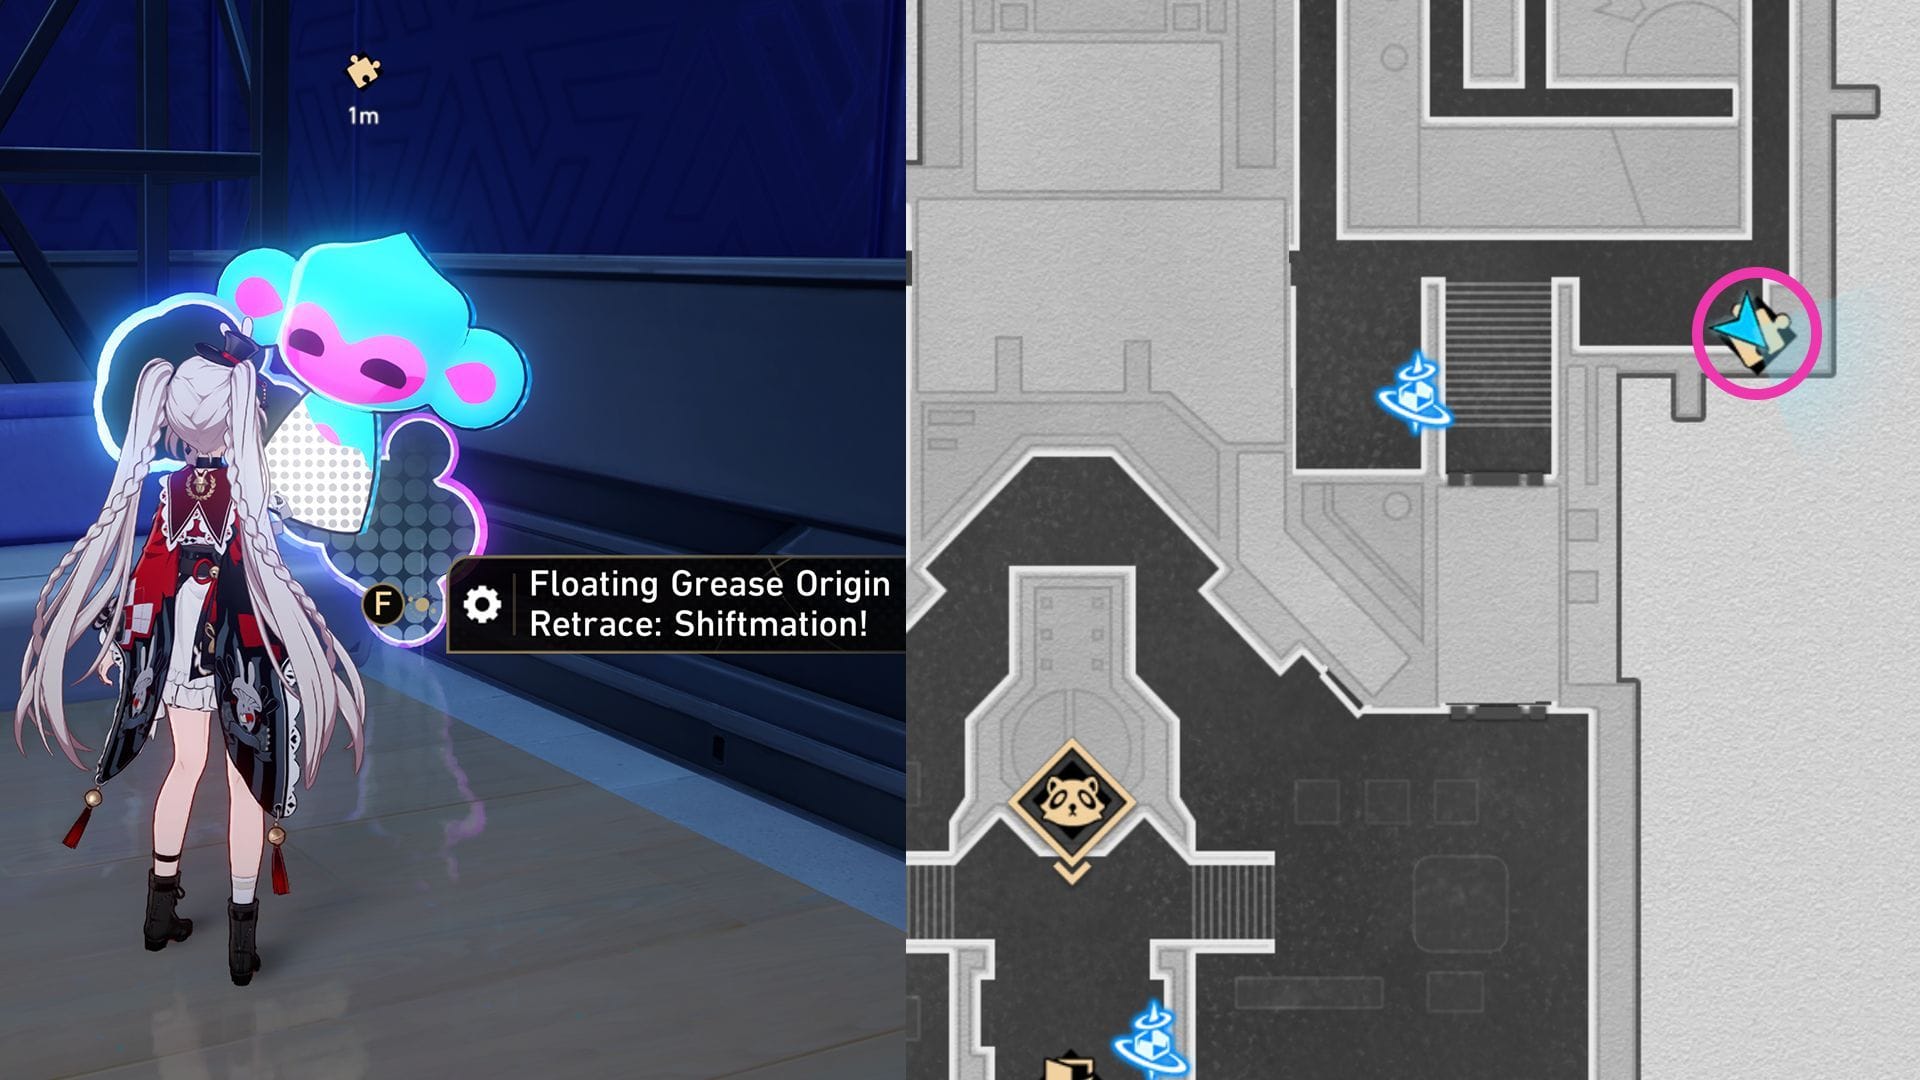
Teleport to the Battle Lobby Space Anchor, and head right to reach the last Shiftmation Puzzle in the Pearluxe Tower map.
Follow these steps to solve the puzzle:
- Head left and stand beside the windmill, right beneath edge of the blue block above.
- Press E once to rotate the world anticlockwise.
- Use the blocks on the left to jump to the top and reclaim the paint.
- Jump down to the very bottom, walk past the windmill, and go right till you reach the edge of the platform.
- Press Q to rotate the world clockwise.
- Jump left to reach the windmill on the left, and reset the spin count.
- Jump to the top and reclaim the paint.
- Head left twice to reclaim the two remaining paints.
- Simply walk right to interact with the monkey and complete the puzzle.
Also read: Honkai Star Rail Pearluxe Tower treasure chest locations
Follow Sportskeeda for more Honkai Star Rail news, updates and guides.
Are you stuck on today’s Wordle? Our Wordle Solver will help you find the answer.
Edited by Aishwarya Ghosh